How to Build a Coding Agent Harness From Scratch
What goes into a coding agent harness: the agent loop, tool registry, stop conditions, context management, and sandboxing, explained with real build examples.
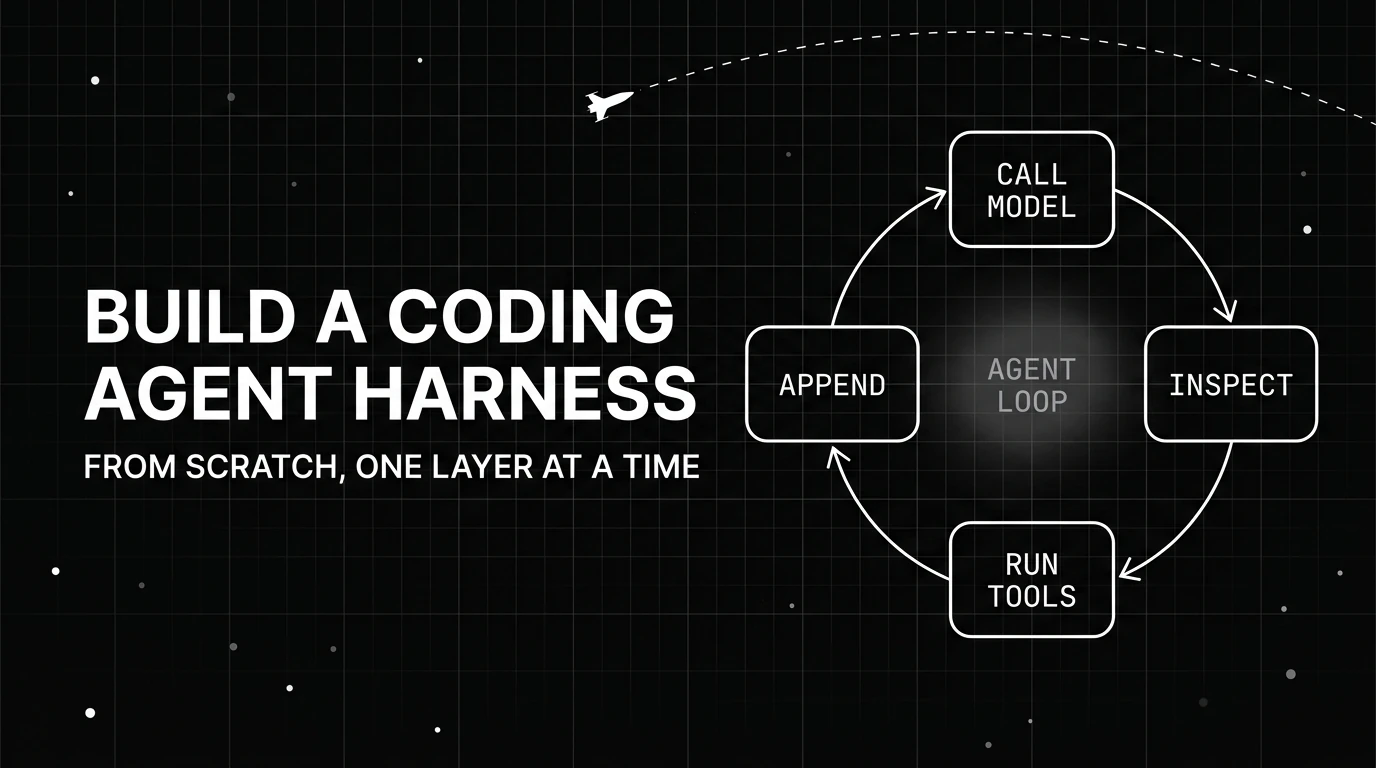
Table of Contents
You paste a model call into a script, it answers a question, and you have a chatbot. Then you ask it to read your files, run the tests, and fix what breaks, and suddenly one call is not enough. The layer that closes that gap is the harness, and it is smaller than most people expect. Build it once and you understand every coding agent you will ever use.
This guide builds a coding agent harness in Python, one layer at a time, with a working snippet for each. By the end you will have the provider call, the agent loop, a tool registry, context management, a sandbox, and a permission check, which together are what turn a model into an agent that acts on real code.
What Is a Coding Agent Harness and Why Build One?
A coding agent harness is the scaffolding around a language model that runs the loop. It calls the model, executes the tools the model asks for, appends the results to the conversation, and repeats until a stop condition fires. The model does the reasoning. The harness supplies the environment.
You can get an agent from a framework in a few lines, so why build an agent harness yourself? Because doing it by hand is the fastest way to see what every framework hides, and because production teams end up needing control over the loop, the tool boundary, and the safety layer that a default cannot give them. The pieces are small enough that hand-rolling them is a weekend, not a quarter.
The table below lists the six layers this guide builds. Each maps to one real implementation choice and one snippet you can run.
| Layer | Responsibility | Real implementation example |
|---|---|---|
| Provider | Abstract the model API call | Anthropic SDK, OpenAI SDK, Bedrock |
| Agent loop | call, inspect, execute, append, repeat | Edd Mann while-loop; OpenAI Runner |
| Tool registry | Define, validate, dispatch tool calls | Pydantic schema to JSON Schema export |
| Context manager | Track token budget, compact history | Append-only JSONL plus summary entries |
| Sandbox | OS-level execution isolation | bubblewrap, seatbelt, container or microVM |
| Permissions | Approve or block individual tool calls | Pre-call rule pipeline; approval hooks |
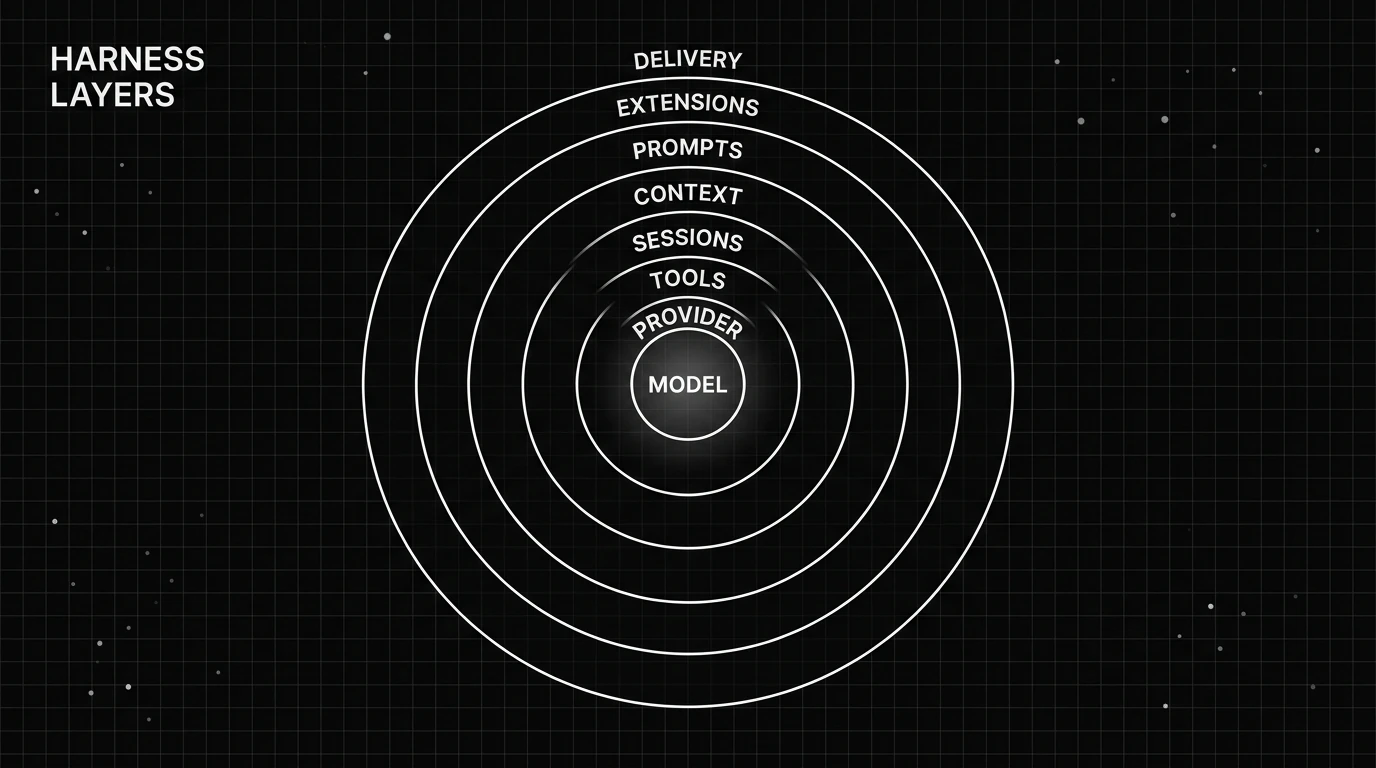
Seen as a whole, those layers form the agent harness architecture: a set of rings around the model, from the provider call at the center out to delivery. The outermost ring, delivery, is how the agent reaches users, so this guide focuses on the six inner layers that make it work.
How Does the Core Agent Loop Actually Work?
Everything starts with a single provider call. You send a list of messages and a model id, and you get a response back.
import anthropic

client = anthropic.Anthropic()

response = client.messages.create(
    model="claude-opus-4-8",
    max_tokens=1024,
    messages=[{"role": "user", "content": "List the files in this repo."}],
)
print(response.stop_reason)
This is the entire provider layer: one call that sends the conversation and returns a response. The max_tokens field is required and has no default, which trips up most first attempts. The stop_reason on the response is what the loop reads to decide what happens next.
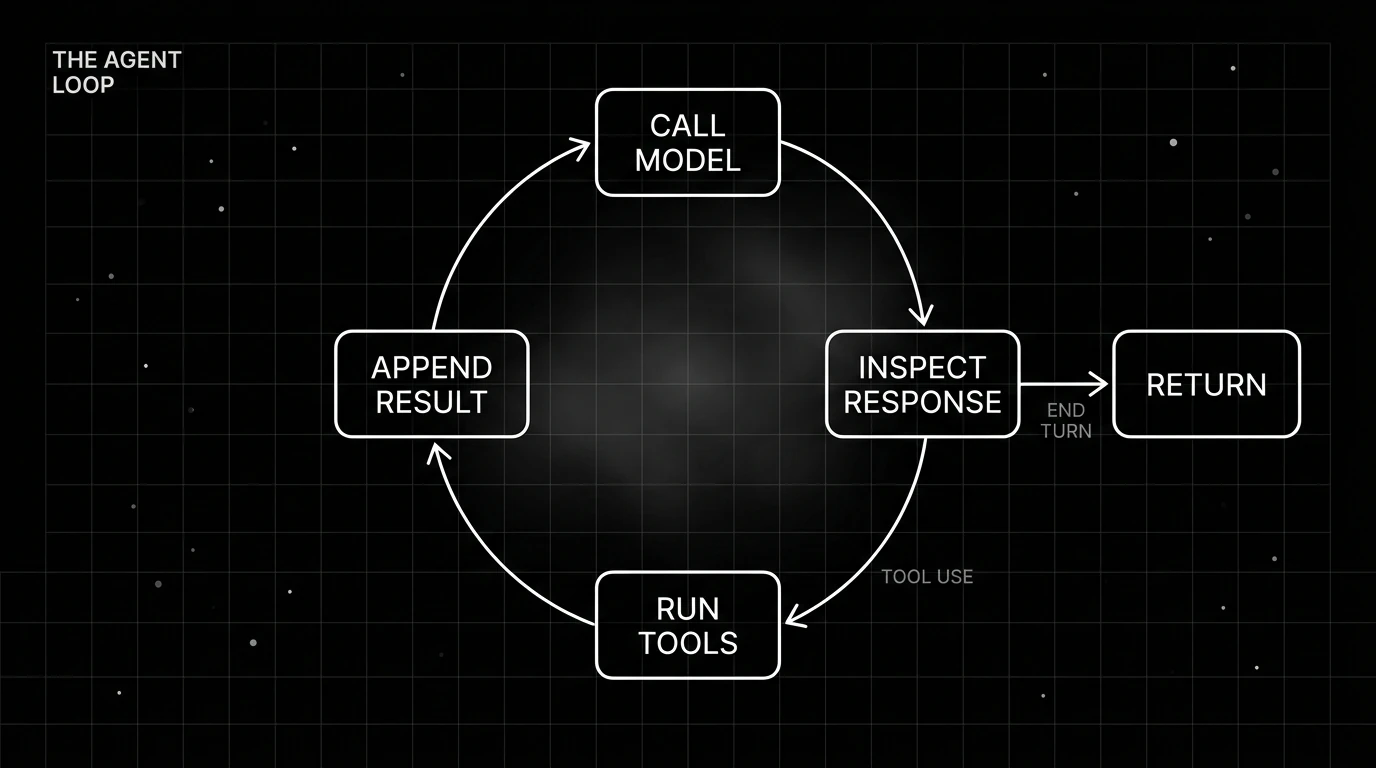
The loop wraps that call. On each turn the harness inspects the response, and if the model asked for a tool, it runs the tool, adds the result to the conversation, and calls the model again. When the model stops asking for tools, the loop returns.
What Happens on Each Turn of the Loop?
def run_agent(client, messages, tools, handlers, max_turns=25):
    for _ in range(max_turns):
        response = client.messages.create(
            model="claude-opus-4-8",
            max_tokens=1024,
            tools=tools,
            messages=messages,
        )
        if response.stop_reason != "tool_use":
            return response

        messages.append({"role": "assistant", "content": response.content})
        results = []
        for block in response.content:
            if block.type == "tool_use":
                output = handlers[block.name](**block.input)
                results.append({
                    "type": "tool_result",
                    "tool_use_id": block.id,
                    "content": output,
                })
        messages.append({"role": "user", "content": results})
    raise RuntimeError("max turns exceeded")
This function is the whole engine. It calls the model, returns the moment stop_reason is anything but tool_use, and otherwise runs every requested tool, appending the assistant message first and then one user message carrying all the results. The for _ in range(max_turns) ceiling stops a bad stop condition from looping forever. Thorsten Ball’s well-known walkthrough builds a working file-editing agent with three tools in under 400 lines of Go, most of it boilerplate, which is a good reminder that the loop is not the hard part. For a runnable Python version you can paste and extend, see how to build a minimal agent harness in Python.
How Do You Define and Register Tools?
A tool registry maps a name to two things: a schema the model reads and a function the harness calls. Writing JSON Schema by hand is tedious and drifts from the code, so a typed model generates it for you.
from pydantic import BaseModel

class ReadFile(BaseModel):
    path: str

def read_file(path: str) -> str:
    with open(path) as f:
        return f.read()

TOOLS = [{
    "name": "read_file",
    "description": "Read a UTF-8 text file and return its contents.",
    "input_schema": ReadFile.model_json_schema(),
}]

HANDLERS = {"read_file": read_file}
The registry keeps the two halves the harness needs side by side: the schema in TOOLS that the model sees, and the callable in HANDLERS that the harness dispatches. Pydantic’s model_json_schema() builds the JSON Schema straight from the typed model, so the schema and the function can never drift apart. Adding a tool means adding one model, one function, and two dictionary entries.
How Does the Model Signal That It Wants a Tool?
The model never runs anything itself. When it wants a tool, the response comes back with stop_reason set to tool_use and one or more tool_use blocks in the content, each carrying a name, a generated id, and an input object. The harness reads those blocks, dispatches through the handler map, and returns a tool_result that references the same id. That id match is what ties a result back to its request, and getting it wrong is the most common early bug.
How Do You Manage Growing Conversation History?
The message list grows on every turn. A few dozen tool calls and you are pushing the model’s context window, where answer quality drops and cost climbs. The harness has to watch the size and act before it hits the wall.
def maybe_compact(client, messages, last_usage, budget=150_000):
    if last_usage.input_tokens < budget:
        return messages
    head, tail = messages[:-6], messages[-6:]
    digest = client.messages.create(
        model="claude-opus-4-8",
        max_tokens=1024,
        messages=head + [{"role": "user", "content": "Summarize the work so far as short bullet points."}],
    )
    summary = digest.content[0].text
    return [{"role": "user", "content": f"Summary of earlier turns:\n{summary}"}] + tail
After each model call, response.usage.input_tokens reports how large the context has grown, so the harness compares it to a budget set below the model’s window. When history crosses that line, it summarizes the older turns into a short digest and keeps only the most recent messages intact. The raw history can be written to a log first, so nothing is lost for auditing. Compaction is the layer most first builds skip, and it is the one that decides whether an agent survives a long task.
What Stop Conditions Should Every Harness Implement?
A loop with no exits is a bug waiting to happen. Every harness needs at least three stop conditions: a clean finish when the model returns text with no tool calls, a max-turns ceiling so a bad state cannot spin forever, and escalation when a tool fails in a way the model cannot recover from.
| Condition | Trigger | Recommended handling |
|---|---|---|
| Clean finish | No tool-use blocks in the response | Return final text to the caller |
| Max turns | Turn counter hits the ceiling | Raise an error or return partial output |
| Tool error | A tool returns an error | Retry transient errors; surface permanent ones |
| Refusal | The model declines | Log and surface to the user |
| Context overflow | Token count nears the model limit | Compact history, summarize older turns |
The tool-error row is the one people underbuild. A transient failure like a network blip or a locked file is worth one silent retry. A permanent one like a missing binary or a rejected credential should stop the loop and surface, because letting the model keep guessing burns turns and money for nothing. Deciding which errors are retryable up front keeps a single bad tool call from cascading into a dozen wasted rounds.
The OpenAI Agents SDK formalizes these into named outcomes, raising MaxTurnsExceeded when the turn ceiling is hit and detecting a final output when the model returns typed text with no tool calls. You do not need the SDK to copy the idea. The ceiling in the loop above is the single most important guard against a runaway bill.
How Do You Sandbox Tool Execution Safely?
The moment a tool can run shell commands, the model can reach your filesystem and your network. Real harnesses isolate tool execution at the operating-system level, so a mistaken or manipulated command cannot escape.
import subprocess

def run_in_sandbox(command: str, workdir: str) -> str:
    result = subprocess.run(
        [
            "bwrap",
            "--ro-bind", "/usr", "/usr",
            "--ro-bind", "/lib", "/lib",
            "--bind", workdir, workdir,
            "--proc", "/proc", "--dev", "/dev",
            "--unshare-net", "--die-with-parent", "--new-session",
            "bash", "-c", command,
        ],
        capture_output=True, text=True, timeout=30,
    )
    return result.stdout or result.stderr
Every shell command the model asks for runs inside bubblewrap instead of on the host. The read-only binds expose system libraries, --bind workdir grants write access to just the project directory, and --unshare-net removes network access entirely. A command that reaches outside those boundaries fails at the OS level, where the model cannot argue its way past.
What OS Primitives Underpin Real Sandboxes?
On Linux the tool of choice is bubblewrap, the same primitive Flatpak builds on; on macOS it is the seatbelt sandbox invoked through sandbox-exec. Anthropic reported that pairing a filesystem boundary with a network boundary let it safely cut permission prompts by 84% in internal use, because most actions became safe by construction. Missing either boundary leaves an escape route open.
Isolation limits what a tool can reach. A permission check decides which tools run at all.
DANGEROUS = ("rm -rf", "git push", "sudo", "curl", ":(){")

def check_permission(tool_name: str, tool_input: dict) -> bool:
    if tool_name != "run_bash":
        return True
    command = tool_input.get("command", "")
    return not any(bad in command for bad in DANGEROUS)
Before the harness dispatches a tool, it passes the call through a check that can approve it, block it, or route it to a human. Here any run_bash command containing a dangerous pattern is refused before it ever reaches the sandbox. In production this is where per-tool allowlists and human-in-the-loop approval hooks live, and it pairs with the sandbox so that isolation and gating cover each other.
How Do Context Compaction and Long Sessions Work?
Compaction summarizes older turns into a short digest the model can still reason from, while the raw history is written to an append-only log so nothing is lost for auditing. Edd Mann’s write-up stores each turn as a line of JSONL and folds old ones into structured summary entries, which keeps the live context small and the full record intact.
The judgment call is what to keep verbatim. Recent turns, the file being edited, and the original task usually stay uncompacted, because those are what the model reaches for next. Older exploration and dead-end tool output are the safe things to fold into a summary. A common trigger is a fraction of the model’s window, say 70%, so the digest is written while there is still room to act on it instead of at the moment the context overflows.
For sessions that branch, some harnesses keep a session tree, so a run can fork at a checkpoint and a bad path can be rewound without losing the good work before it. That is the difference between an agent that handles a ten-minute task and one that keeps its footing across an hour of work.
What Does a Production-Ready Harness Add on Top?
The six layers so far are a working agent. Production wraps more rings around them. Edd Mann frames the full surface as seven concentric layers: providers, tools and permissions, sessions and state, context and compaction, prompts and skills, extensions, and delivery. Most of that is not the loop. It is everything that makes the loop safe, resumable, and shippable.
One advanced pattern worth knowing is executable code actions, where the model writes a short script instead of emitting many separate tool calls. Microsoft reported in internal benchmarks that this approach cut end-to-end latency by about half and token use by more than 60% on representative workloads, with the tradeoff that generated code needs the sandbox from the very start.
Which ring to build first depends on the failure you hit. If the agent loops forever, you need stop conditions; if it wanders after long tasks, you need compaction; if it can touch things it should not, you need the sandbox and the permission check. Start from the layer that is breaking, and reach for what a harness is, the engineering discipline behind it, or a ready-made harness when building the next ring costs more than adopting one.
Return to the script you started with. Wrap that one model call in a loop, a tool registry, a context manager, a sandbox, and a permission check, and the chatbot becomes an agent that can read your files, run your tests, and fix what breaks, without ever reaching for something it should not.
Frequently Asked Questions
What is a coding agent harness?
How many lines of code does a minimal harness take?
What are the required stop conditions?
What is context compaction and why does it matter?
What sandboxing options exist for tool execution?
Does every harness need a custom tool registry?
A step-by-step Python guide to the agent harness loop: tool schema setup, stop_reason handling, parallel tool calls, and the bugs every builder hits first.

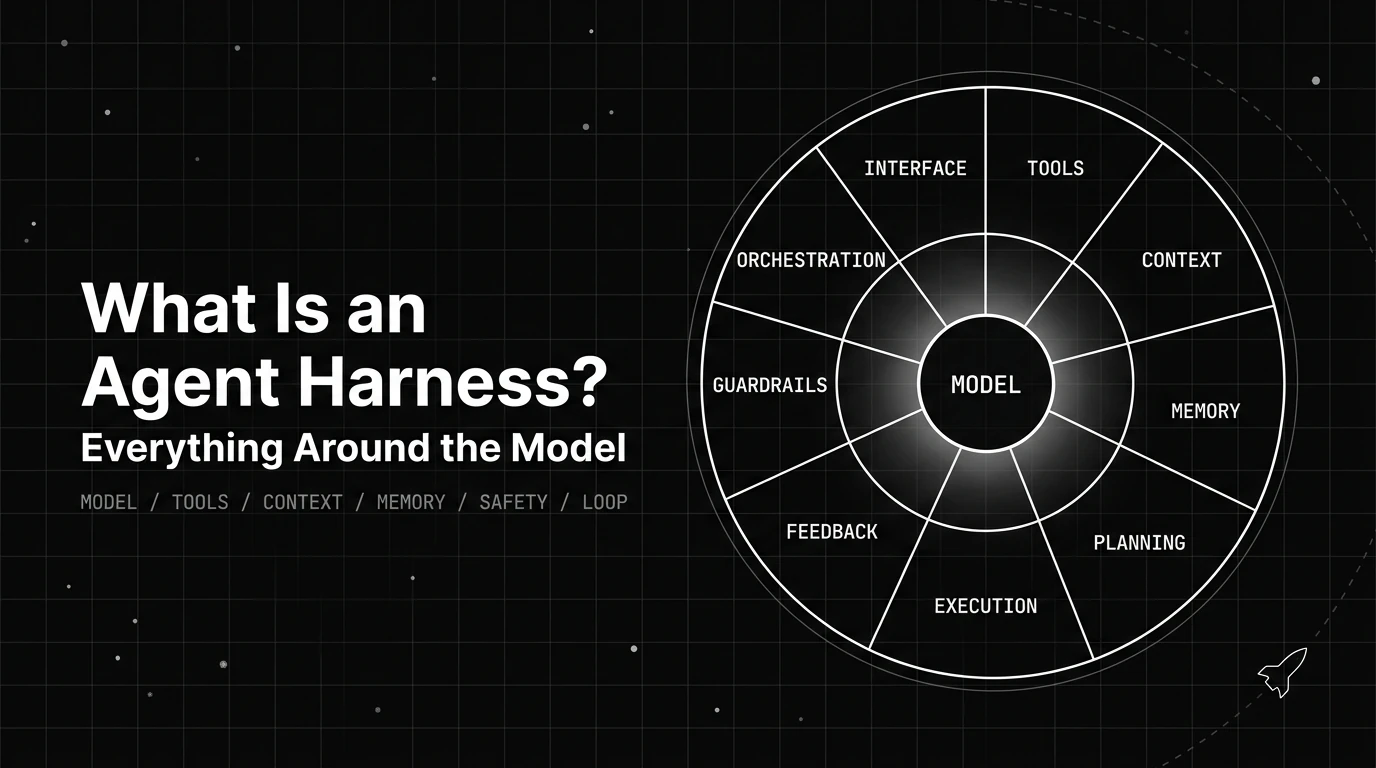
An agent harness is the runtime layer around an LLM that manages tools, context, state, execution, and safety. Learn how it shapes reliability.
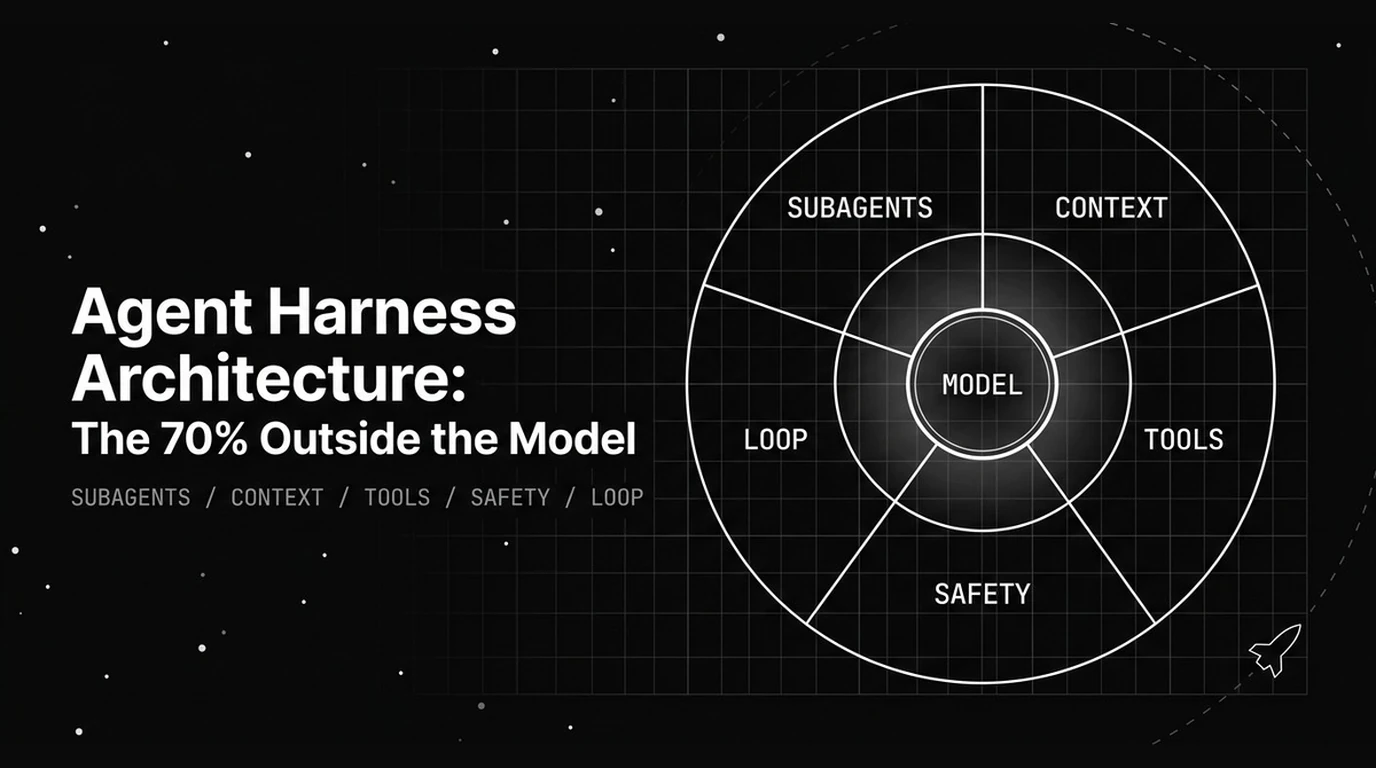
How agent harness architecture shapes performance across five dimensions, from context and tools to safety and the loop that often outweighs a model upgrade.